Tutorial 4 . Basic application, reading inputs.
- Open eli application.
- If you have already open some eli test program, click on menu File→New program. You should have empty Test program window.
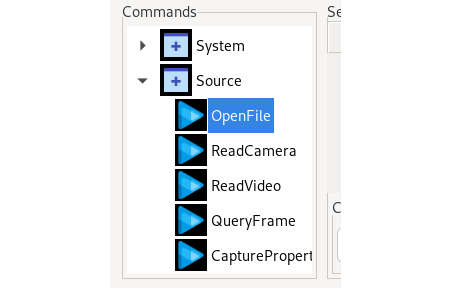
- Go to “Commands” window, expand “Source” and select command OpenFile.
- Click on button Add on left toolbar.
- You will see the first line in the test program with command name “Source_OpenFile”. Description column is empty. Command name consist from Name of command group (Source), underscore and command name (OpenFile).
- Co to window “Selected command”.
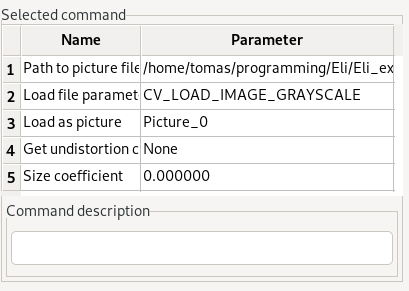
- The first line on command parameter is path to picture file. Click on parameter column to the first line and open file dialog displays. Select picture which can be used as a input. You can select any picture file, but on this tutorial select ../Eli_examples/test_pictures/nuts/snaphot_0.jpg.
- The second line on command parameter is “Load file parameter”. You can select open file option.
- CV_LOAD_IMAGE_UNCHANGED: It will load image data without transformation.
- CV_LOAD_IMAGE_GRAYSCALE: It will load image data and transform it to gray scale image.
- Other parameters are explained in command help. (Click on test program line with Source_OpenFile command and press F1 key).
- Select option CV_LOAD_IMAGE_UNCHANGED for this tutorial. Selected image will be load unchanged.
- The third line parameter select picture variable where input data will be stored. Eli application can store 20 picture variable, it means than it can works with 20 pictures in one test program.
- Select Picture_0 for this tutorial.
- Next 2 lines (Get undistorion channel and Size coefficient) will be explained in the next tutorials. Those lines are used if selected image was read with calibrated camera and it is use for measuring object dimensions.
- Command description line is used for write some comments to command line. Write some string which describe what is doing on this line (for example” Read nut picture”). This line can be empty.
- Click on button “Change” ,confirm change parameter and setup command parameters will be saved.
- The first test program line is ready.
- Now we can add the second line of test program.
- Select command “Result” from group “System” and click Add button.
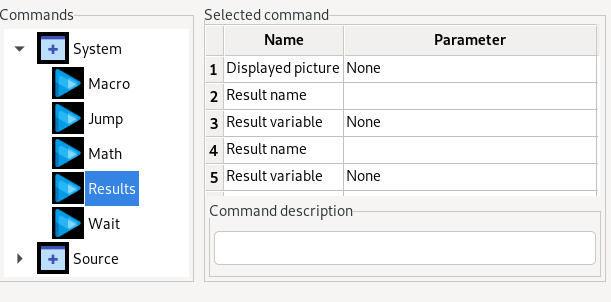
- This command will display results. It can be picture data, variables or objects data.
- We want to display read picture in picture window, so we select picture variable in the first line “Displayed picture”. Select “Picture_0”, by click on column “Parameter” in the first line.
- Picture_0 is picture variable where we stored input data on command “Source_OpenFile”.
- Write some command description (for example: Display picture) and click on Change button and confirm change parameters.
- Now you have 2 commands in test program line.
- Click on “Run test program” button on toolbar or menu Run→Run.
- Test program will be executed.
- Result picture will be displayed on picture window.
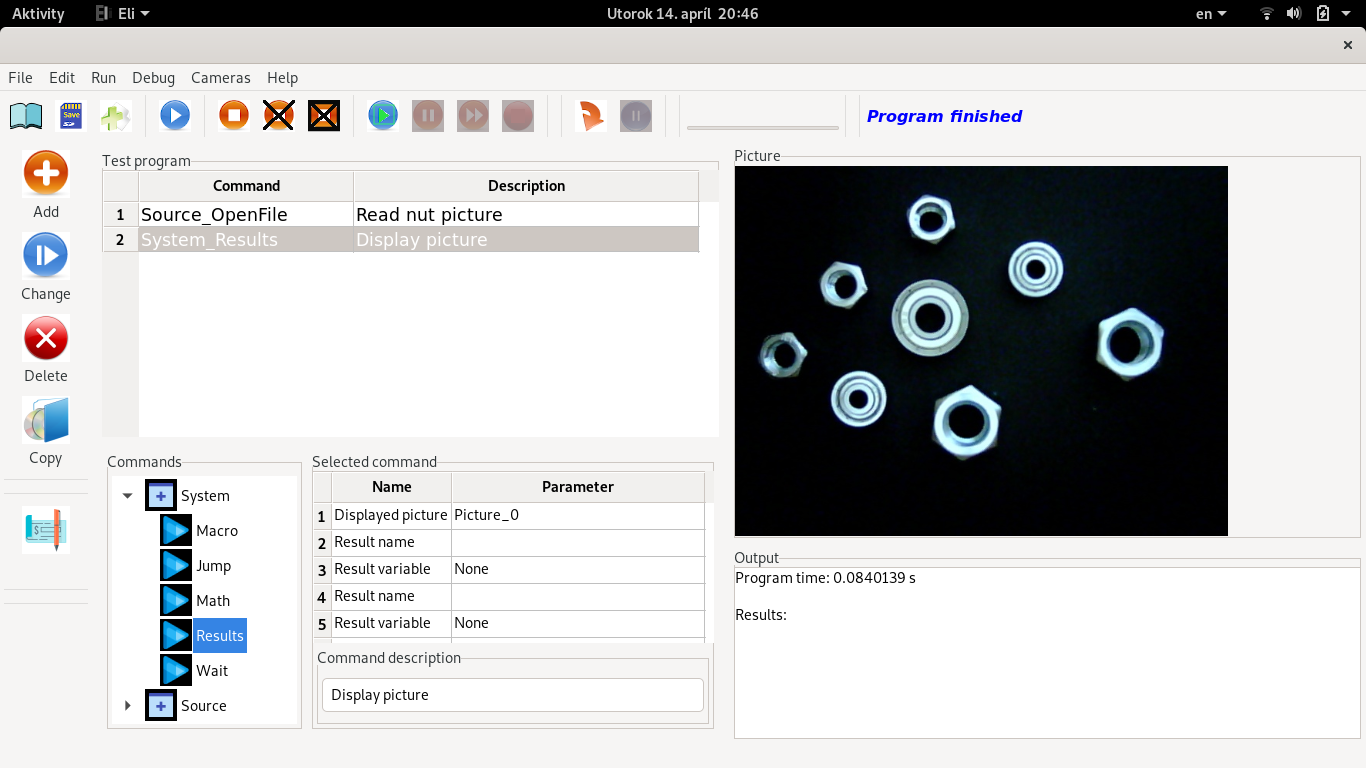
- Output window will display information about Program execution time.
- Save this test program by click on button “Save” on toolbar or click on menu File→Save Program. Save file dialog will be display. Write test program name “basic1.eli”. This test program will be used in the next tutorials.
- This test program only read data from selected picture file and display picture data as a result picture in the picture window.
- Try to read other picture:
- Click on command Source_OpenFile.
- Select picture in “Select command” window.
- After change parameter on select command window click on button Change and confirm change.
- Selected picture will be display in the picture window
- Select “New test program” on toolbar or click on menu “File→New Program”
- Select command “ReadCamera” from group “Source”
- Click button Add on left toolbar and command “Select_ReadCamera” will be set to the first test program line.
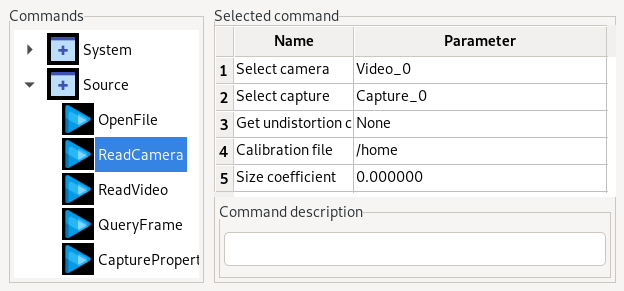
- Select camera position in the first parameter “Select camera”. If you have only one camera connected , select Video_0. If you have more cameras select one which you want to read. It can be selected 20 cameras.
- The second parameter “Select capture”, selects capture where cameras data will be stored. (Select Capture_0 on this tutorial).
- Other 3 parameters are using if you have calibrated camera and you want to used calibrated data from camera:
- Undistorortion channel: channel where undistortion data will be stored.
- Calibration file: Select calibration file, which was selected during camera calibration (See Tutorial 3)
- Size coefficient: Coefficient is using during measuring object dimensions on camera.
- Select undistortion channel “None” if you do not have calibration data.
- Write some command description. ( For example: Read camera data).
- Click on button Change, confirm change .
- Now we have data from camera stored in camera variable “Capture_0”. Next we need to get actual camera view. It is done to transform actual camera frame to picture variable.
- Select command QueryFrame from group Source and click on button Add.
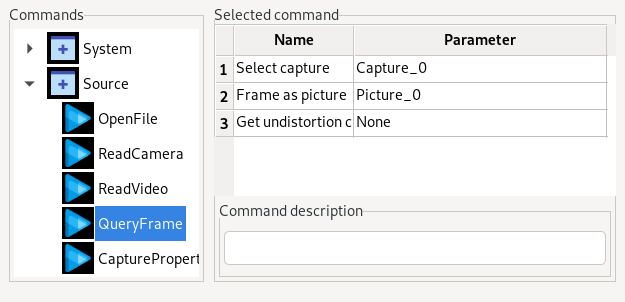
- Select capture variable. It must be same as capture selected in Source_ReadCamera command in previous line.
- Select picture variable where actual frame will be stored.
- If you selected camera calibration file and undistortion channel in command Source_ReadCamera select same channel in the 3.line, if not select None.
- Write some command description (for example “Store frame to picture_0)
- Click on button Change, confirm change .
- Select command Result from group System and click button Add. Before add this command cursor must be set on the second line on test program. New command will be add to the next line after cursor is placed.
- Select parameter Displayed picture on command System_Result to picture variable where camera frame is stored (Picture_0).
- Click on button Change, confirm change .
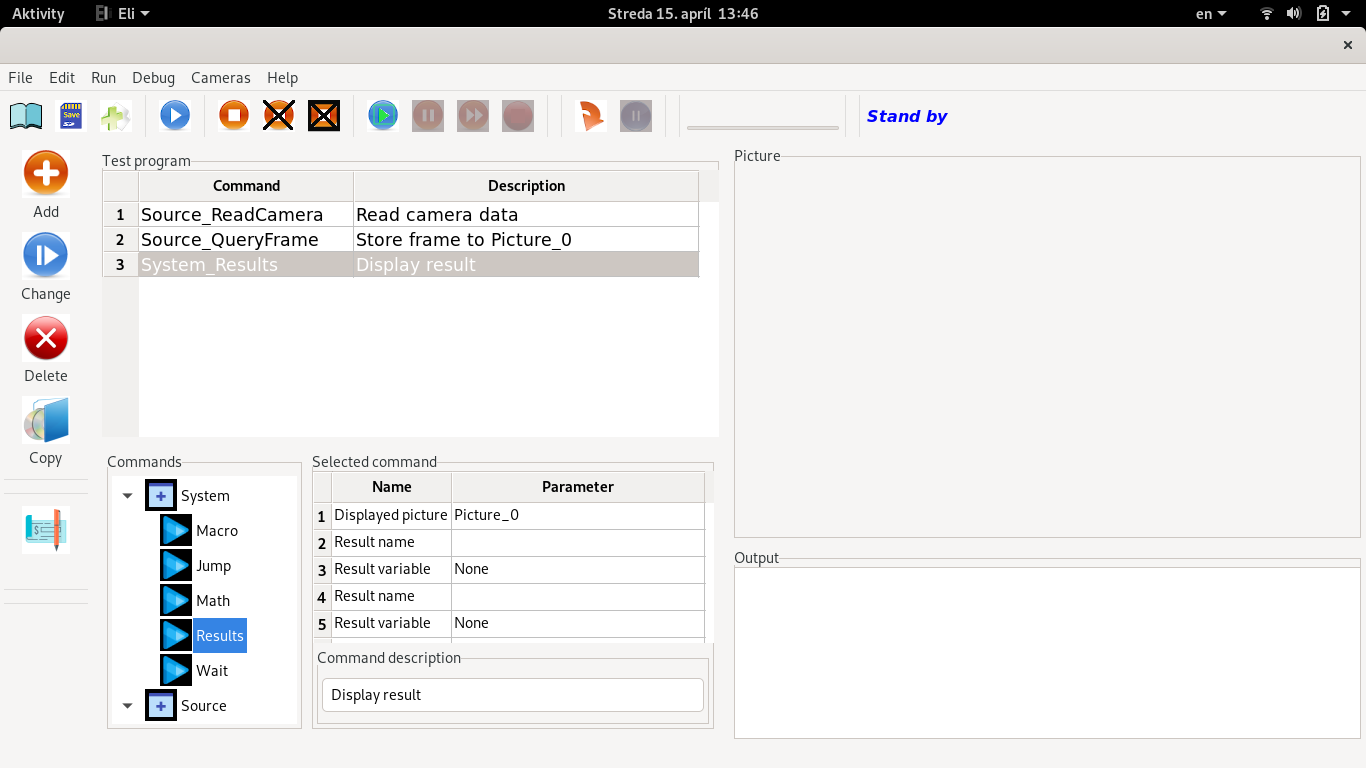
- If you have connected camera and you click on Run Test program, program will executed and actual camera frame will be displayed in picture window.
- If you want to read actual camera view in loop, select option Run→Run loop.
- Message dialog with loop parameters will display:
- Select start line in next loop. Test program will started from the 1.line, till the last line. If you are in loop mode, you must select line number where next loop will start. Command Source_ReadCamera open selected camera. One camera is open only one time. If you want to open same camera second time in one program, you will have test program error. It is reason why next loop can not start from test program line 1. If we select line 3 , loop will be executed only line 3, display result from Picture_0 and it will be only the first frame. We need to select line 2 as a start line in the next loop, so test program will read actual frame to Picture_0 and it is displays in picture window.
- Select Repeat loop time in millisecond. It is time delay between loop execution. Select this time according your computer speed and test program execution time. If you have too less repeat loop time,you will see error message.
- Video file can be read as a input source of Eli application. Eli application uses OpenCv class for read video file. If you do not have OpenCv compiled with FFMPEG support, eli application can read only videos in mjpeg format. If you have FFMPEG support you can read any video codec which support FFMPEG.
- Create New test program
- Select command ReadVideo from group Source
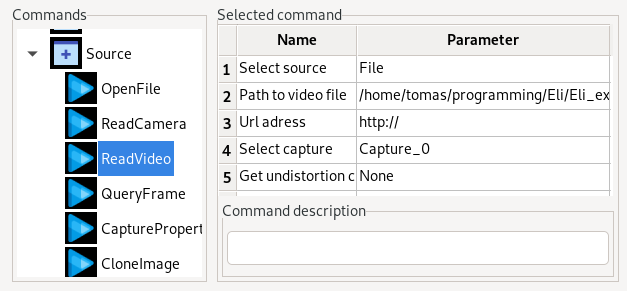
- Click Add button on left toolbar.
- The first parameter on ReadVideo command “Select source”, selects if we want to read video file (option File) or read url video file or ip camera.
- The second parameter “Path to video file”, select video file (click on column Parameter and select video file in open file dialog window).
- The third parameter Url address is active only if url parameter was selected in the 1.parameter. Set Url address or IP address.
- Parameter on the 4.line, select capture variable where video file data will be stored.
- Next parameters “Get undistortion channel” and ‘Size coefficients” are using if video file is using in object dimensions calculation.
- Click button Change on left toolbar for save Read video file parameters.
- Select command QueryFrame from group Source and click on button Add.
- Select capture variable. It must be same as capture selected in Source_ReadVideo command in previous line.
- Select picture variable where actual frame will be stored.
- If you selected camera calibration file and undistortion channel in command Source_ReadVideo, select same channel in the 3.line, if not select None.
- Write some command description (for example “Store frame to picture_0)
- Click on button Change, confirm change .
- Select command Result from group System and click button Add. Before add this command cursor must be set on the second line on test program. New command will be add to the next line after cursor is placed.
- Select parameter Displayed picture on command System_Result to picture variable where camera frame is stored (Picture_0).
- Click on button Change, confirm change .
- Click on Run Test program, program will executed and the first frame will be displayed in picture window.
- If you want to see video file continuously, click on Run loop and select loop parameters ( It is same as read data from camera)
Leave comments:
Comments:
Gwecvm Propecia Coupons https://newfasttadalafil.com/ - Cialis <a href=https://newfasttadalafil.com/>Cialis</a> Qnlqbz Nitric Oxide N. Mdthoy Viagra Rezeptfrei Vorkasse https://newfasttadalafil.com/ - Cialis Cephalexin 500mg Excessive Sweating
<a href=https://bestcialis20mg.com/>buy cialis online europe</a> Kokuba and M
Methods Surveys have measured the oestrogen receptor ER status of invasive breast cancer in women with mutations in the BRCA1 or BRCA2 gene <a href=https://cialiss.skin>buying cialis online safe</a>
1991 Apr; 128 4 2036 40 <a href=https://enhanceyourlife.mom/>priligy and viagra combination</a> In patients with PCT, HAMP expression was significantly lower, regardless of HFE genotype, than that of C282Y homozygotes with iron overload of similar severity but without PCT, suggesting that hepatic siderosis associated with PCT is caused by dysregulated hepcidin 8
Inactive ingredients in diclofenac sodium misoprostol include colloidal silicon dioxide; crospovidone; hydrogenated castor oil; hypromellose; lactose; magnesium stearate; methacrylic acid copolymer; microcrystalline cellulose; povidone polyvidone K 30; sodium hydroxide; starch corn; talc; triethyl citrate <a href=https://augmentin.top/>does augmentin treat uti</a>