Tutorial 8 . Working with objects
Tutorial 8 will continue from previous tutorial. It was explained how can be created objects program, working with object module window and using object filter. We detected four objects on object module window. This tutorial explains how to work with objects on main test program window.
Working with objects
- Open program basic4.tpg from previous tutorial
- Put break on line 7 (Object_Find command)
- Run test program in debug mode
- When program stop on break click on “Run one step” command.
- Object window displays.
- Click on Run Filter button on toolbar.
- Click on button Find object on toolbar.
- All founds objects will be displayed on Detail window.
- Click on button Object list on toolbar and display all found objects on picture window. Check if object was found correctly.
- If all is ok, you should have:
- 2 objects NUT12
- 3 objects NUT8
- 2 objects BEAR5
- 1 object BEAR8
- Close Object module window by click on button Close
- Test program will finish
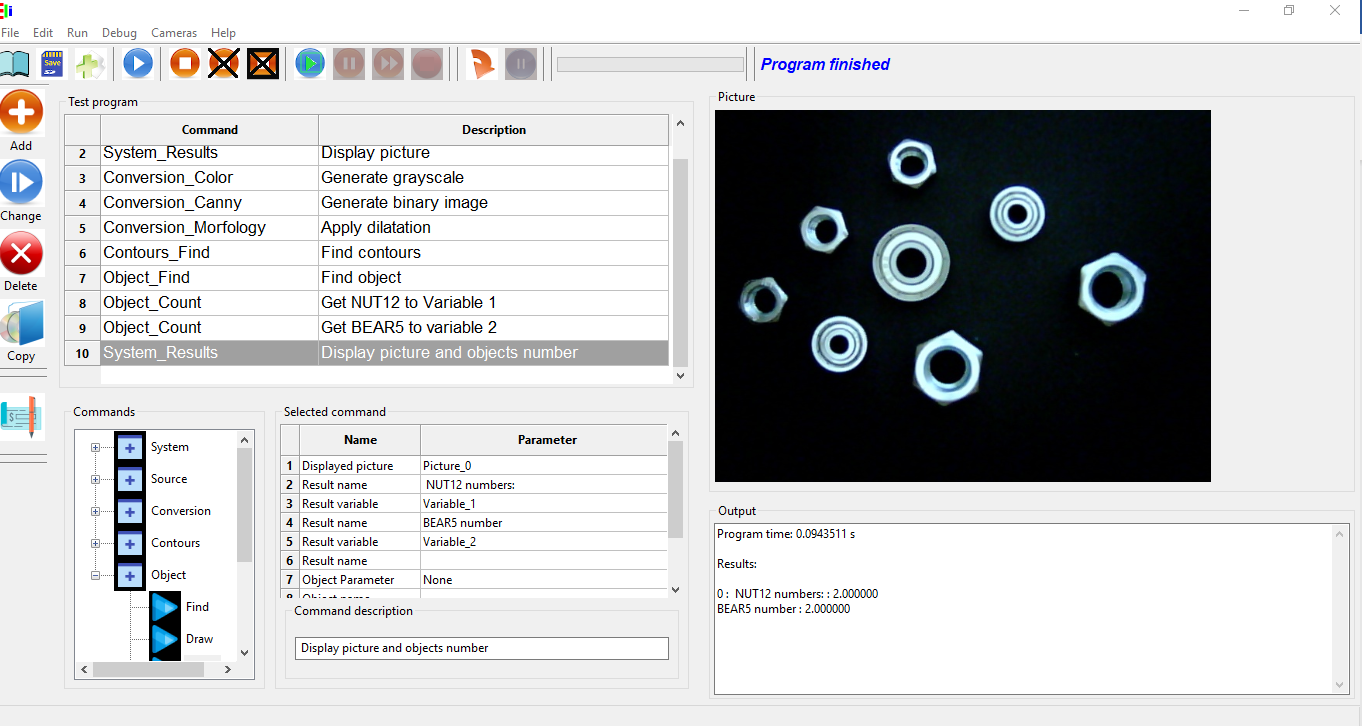
- Keep cursor on test program line 7 and add command Count from command group Object and click on button Add. Object_Count command is adding to 8. line.
- Setup command parameters:
- Write Object_name to NUT12
- Result to: Select Variable 1
- Click on button Change for store changes
- Add next command Object_Count and setup command parameters:
- Write Object_name to BEAR5
- Result to: Select Variable 2
- Click on button Change for store changes
- Add command System_Result on the last line and setup command parameters:
- Displayed picture: Picture_0
- Result name: NUT12 numbers
- Result variable: Variable 1
- Result name: BEAR5 number
- Result variable: Variable_2
- Click on button Change for store command setup
- Run program and you will see results in Output window

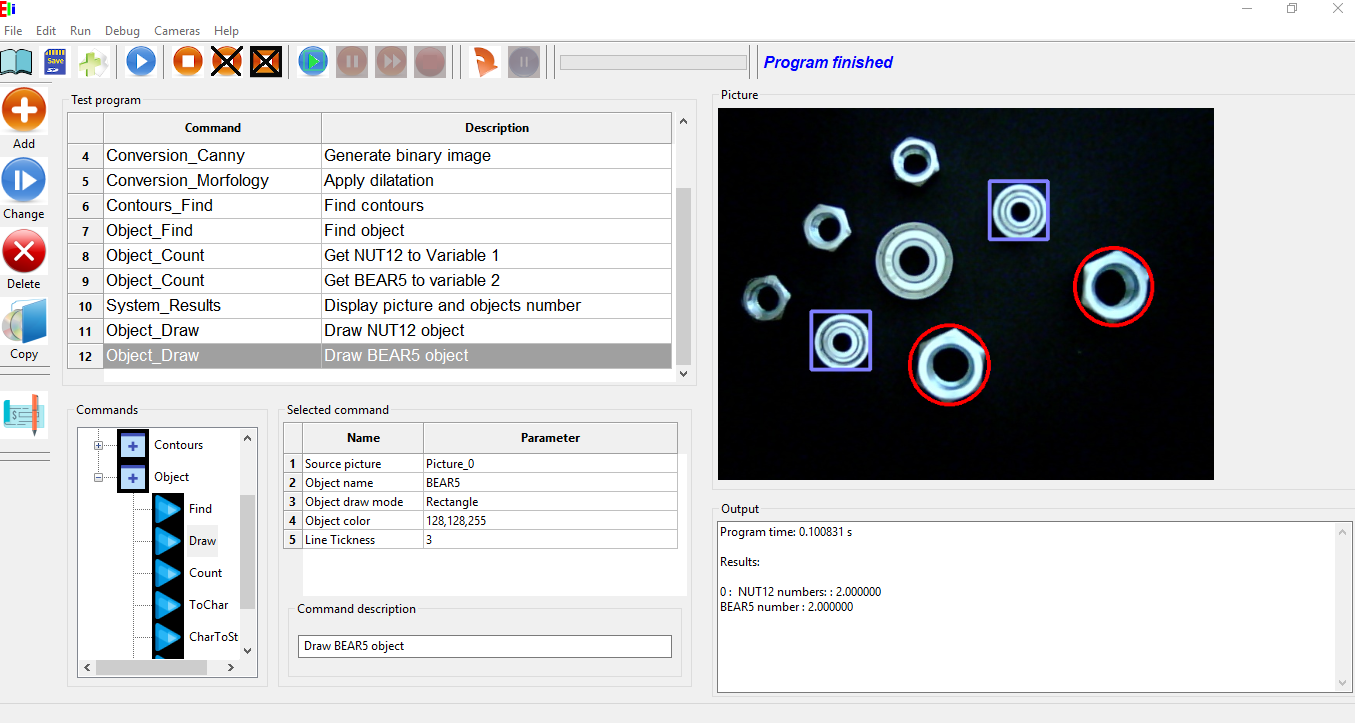
- Source picture: Picture_0
- Object name :NUT12
- Object draw mode:Circle
- Object color: Click on line with this option and color selection dialog will display, select some color
- Line Tickness:3
- Click on button Change
- Source picture: Picture_0
- Object name :BEAR5
- Object draw mode: Rectangle
- Object color: Click on line with this option and color selection dialog will display, select some color
- Line Tickness:3
- Click on button Change

- You can repeat instruction for display also objects NUT8 and BEAR8 and those objects can be displayed or you can read number of objects on picture
Conclusion
This tutorial cover basic operations with objects as objects count or object marking. You can do much more with objects:
- It can be displayed objects parameters as dimensions, positioning picture (It can be in pixels or in real world unit (mm) if picture was read by calibrated camera)
- Objects can be transformed to characters. It can be read text on the picture or numbers on the picture. See multi meter example to explain how to do it
- Test program generated in Eli application can be run in your own application over shared (dll) library. Test program can be run from start to end or can be read as loop. It can be read all system variables and all objects parameters. See example programs directory and find application directory. There are 2 applications:
- wxGui_app2: It is application which shows how to works with Eli library if you use wxWidgets in your application.
- App1: It is example application which can be use in any C++ or c applications.